

I’ve been doing some experimentation with Adobe Edge this past week since it’s preview release on Monday. I figure to have a break, and do some exercises with Adobe Illustrator. Hence, the above: “ill-ocano”.
The Ilocano or Ilokano people are the third largest Filipino ethnolinguistic group. Aside from being referred to as Ilocanos, from “i”-from, and “looc”-bay, they also refer to themselves as Samtoy, from the Ilocano phrase “sao mi ditoy”, meaning ‘our language here.’ The word “Ilocano” came from the word “Iloco” or “Yloco.” ((Source via Wikipedia))
Yes, it looks like the spelling is off, but the explanation of why it is so and the exercise is right after the jump.
So while taking a break and reading some news feeds (Google Reader and Twitter), I came upon some simple black and white logos with nice typography. For some reason, I had my grandpa in my head (who is partly Ilocano) and the lifestyle brand, Illest. ((http://fatlace.com/illest/))

Got to give it up to that cursive, its sexy. Which seems it got its roots ((Since “Everything is a Remix.”)) via one of Golf’s renowned brands, Titleist.

Meanwhile, I then linked the two (Ilocano x “illest”) and derived some wordplay, “ill ocano”. So first thing is first, we need to have a vector version of the “illest” logotype since that will take care some of the letters in “illocano”.

After some google-ing and sticking with an image that is clean and with high-contrast (like the above), we power up Illustrator and open up the image file to derive a vectorized version to play with. If you are stuck on what to google, here’s an idea.
We then select our image in Illustrator, and use the “Live Trace” tool. You can do this by doing the following selections on the main menu:
Object > Live Trace > Tracing Options
You’ll have “Tracing Options” window open for more tweaking like the image below (click to zoom in on the window):

Since this is a simple black and white logo, we just pick the preset with the same name. You can tweak the settings of the Live Trace but I just accepted the presets for this quick warmup. After clicking on the “Trace” button, we then do the following to give us a vector object:
Object > Live Trace > Expand
You’ll probably need to clean it up a bit to get the “illest” part by itself and a flip in colors. ((In case you forgot, the shortcut to the default colors of black (fill, or foreground) and white (stroke, or background) is “D”, and the shortcut to invert the fill/stroke colors is “Shift + X”.)) We’ll have something like the previous image above in vector form.
So we have “ill” of “illocano”. How do we get the “ocano”? There are different ways to do so, the two feasible ones are: first, either to check to see if there’s a font that was used for the design or something close to it; second, sketch it on paper. Since I didn’t have a lot of time, I just went with the possible digital solution and tried to see if I had something similar in my font library. If you can’t come up anything in your machine, you can either google some keywords, or use font-recognition tools. One of the popular ones is MyFonts’ “WhatTheFont”. ((WTF == http://new.myfonts.com/WhatTheFont/ =) ))

In using WhatTheFont, you can either submit the URL of the image file or upload it. In our case, since this is a script with letters adjoining, it might be best to: cut each letter; save in their own respective image file; and upload to the WhatTheFont engine (till you get a good match). After doing so, it seems that the nearest font match is “PlainPensle ExtraBold Italic”.

Amongst other ways, after we have installed the font in our system (and probably a restart of Illustrator), we’ll need to obtain the “ocano” in vector form. Type it in Illustrator and select it via Selection Tool (or press “V”). Then we’ll get its outline or transform it to vector. Either press “Control + Shift + O” or “Command + Shift + O”, or:
Type > Create Outlines
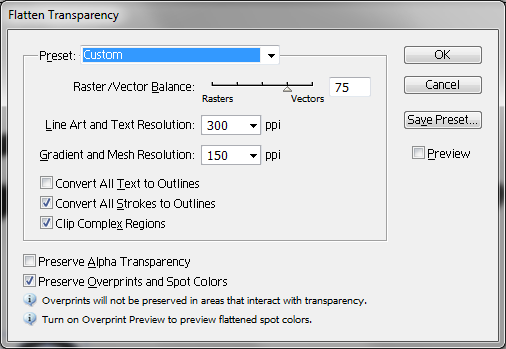
We’ll also would want to make our newly made vector “scalable”, which sounds weird for it being a vector already. But from experience, I usually do a “Flatten Transparency” on the object. I guess its habit from getting things ready for the printers.
Object > Flatten Transparency
You’ll be presented by some options for more tweaking but you can read on that if you like later on. Moving on, we’ll have something like the following vector objects to play around with:

If you notice in the image above, I did some tweaks in order to get the lines smoother and have a natural curve. Other than the Selection and Direct Selection tool, the tools I used to do so were less than a handful: Pen Tool (or press “P”); and the Unite (Shape Mode) and Divide (Pathfinders) actions under the Pathfinder window. If the Pathfinder window is not visible, you may enable it via “Control + Shift + F9” or “Command + Shift + F9”, or:
Window > Pathfinders

I then did a bit more cleaning up in terms of deliberately making the “ill” standout. If you are not familiar with the lingo of why I did so, check here. If you are, then word! “Pop! Pop!” Some Magnitude action for you.
Anyways, back on track. Here’s a quick snapshot of the Unite-ing and Divide-ing I did below:

From that, you can see that I tweaked the tail of “ill” as I wanted it above in group order of “ocano”. ((Object > Arrange > …)) Doing so would give some kind of differentiation and make it standout to the effect of an intended purpose, and not the act of being illiterate. See what I did there? =) ((il·lit·er·ate » ill·it·er·ate))

I also did some tweaks on the “i”. At most times, the Live Trace product needs to be tweaked if its origin involves some complex curves. Luckily, in this case, it was minimal; but still had to be done cause it bugged me. Here’s a snapshot of what I did to the “i” below:

After doing the above, I then placed and aligned the tweaked “ill” with “ocano”. Then added a stroke on the “ill” group. If the Stroke window is not visible, you may enable it via “Control + F10” or “Command + F10”, or:
Window > Stroke

In case you run into some jagged stroke-lines (as I have below), you will want to zoom in as much as you can and use the Pen tool to remove some anchor(s). This will be in a case-by-case basis depending on the vector you are working with.

After you are content with your vector object’s tidiness and smoothness, use the Selection tool to select the “ill” and “ocano” and Group them up via “Control + G” or “Command + G”, or:
Object > Group
From here, you can either Flatten Transparency or leave as-is:
![]()
Then, save your file… and you are done.
If you have found this to be useful and educational, and would like to donate—please send donations to Red Cross Japan here, and/or Red Cross Philippines here.
Thanks for your time. I hope that helps with your Adobe Illustrator warmup. Cheers!